Coupled lenses are a novel but rather expensive way to increase image magnification. It is done by mounting a long focal length lens directly to the camera with a reversed short focal length lens mounted onto the end of the long focal length lens. If you already have a long focal length lens and a wide-angle lens, it becomes quite inexpensive. This method provides a relatively fixed magnification that relates to the focal lengths of the lenses involved. The magnification is roughly the longer focal length divided by the shorter focal length. With a 50 mm lens reverse mounted on the end of a 200 mm lens, you will get about 4:1 magnification (200/50). Both lenses are optimally set at infinite focus although setting the rear lens (the lens mounted to the camera) to a shorter focus commonly works fine. The principle is very similar to add-on macro lenses. The reversed lens acts much like a high-power add-on macro lens for the normally mounted lens.
Strengths:
- Inexpensive if you already have a short and long focal length lens available – just requires a coupling ring.
- Relatively good quality - although quality suffers as the magnification rises.
Weaknesses:
- Lenses don’t always work well together.
- A little complicated to use.
- Limited magnification range for each combination.
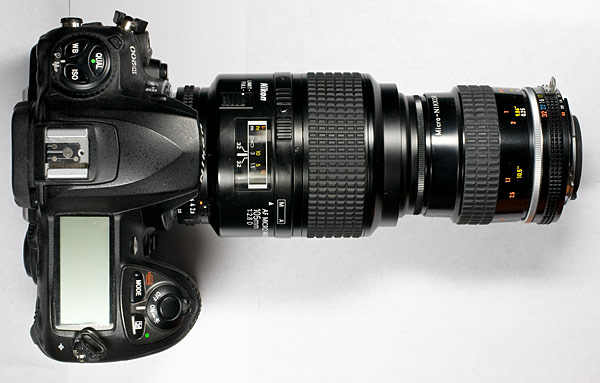
Attaching Coupled Lenses
The longer focal length lens (called the rear lens) is mounted to the camera body in the usual fashion. The shorter focal length lens is reverse-mounted (called the front lens) to the end of the longer focal length lens. The reversed front lens need to have an aprture ring or it will be very difficult to take pictures as the aperture on this lens will need to be set manually.
The lenses are connected with a coupling ring. A coupling ring is a metal ring with male filter threads on both sides. One side screws into the filter thread of the first lens and the other screws into the filter threads of the reversed lens. Coupling rings can be purchased for a few dollars on eBay. As with a reversing ring, you may need to get an adapter to fit to your lens particular filter threads although coupling rings are available in a variety of sizes.
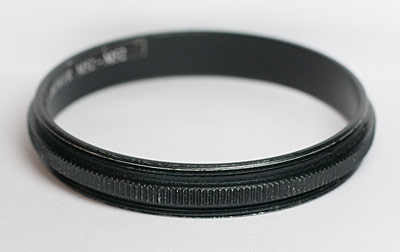
| Common coupling ring sizes | |||||||||
| Size (mm) | 49 | 52 | 55 | 58 | 62 | 67 | 72 | 77 | 82 |
| 49 | + | + | + | + | + | ||||
| 52 | + | + | + | + | + | + | + | ||
| 55 | + | + | + | + | + | ||||
| 58 | + | + | + | + | + | + | + | ||
| 62 | + | + | + | + | + | ||||
| 67 | + | + | + | + | + | ||||
| 72 | + | + | + | ||||||
| 77 | + | + | + | + | + | ||||
| 82 | + | ||||||||
When coupling lenses, the main problem that you may have is with vignetting - darkening of the edges of the image. Vignetting in the case of coupled lenses typically takes the form of mechanical vignetting. With lenses that don’t match well you will see an image of the aperture(s) in the viewfinder surrounded by black.

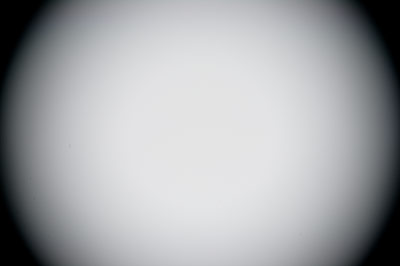
Mild vignetting on the left(105-55 combo front aperture at f/4), bad vignetting on the right(105-55 combo rear aperture at f/8).
Why do coupled lenses commonly display vignetting?
Vignetting with coupled lenses is a very complex topic and is related to optical properties of both lenses and the fact that there are two apertures in play instead of the usual one. It is related to light rays traveling toward a certain point on the image being blocked by one of the apertures on their way through the lens. Light rays that form the image at a single point on the detector can take a myriad of ways through the lens to get to the detector, i.e. the entire lens contributes light to any one image point. If some or all of the rays that contribute to the image at a point are blocked by the rear aperture, the image will be darker or non-existent at that spot.
Vignetting with coupled lenses is related to the front lens forcing the light rays to travel through the rear lens in ways that the lens is not made for (or vice versa). This results in many of the rays traveling through the periphery of the rear lens rather than the center. Going through the periphery of the lenses means that light that intended to make a portion of the image may be partially or totally obstructed by the aperture in the rear lens. This is a hard concept to explain with words, but easier to show with a diagram.

Coupled lenses showing vignetting: The rays from the edge of the image go through the periphery of the rear lens. The rays are completely blocked by the aperture on the rear lens. This area of the image will be black.

Coupled lenses without vignetting: Opening the rear aperture fixes the vignetting.
How to avoid vignetting
Vignetting with coupled lenses can be minimized by the proper choice of lenses, but the success of any two lenses is difficult to predict. There a few basic rules that may help minimize this problem.
- The rear lens should be of a relatively long focal length, typically greater than 100 mm.
- The front lens should be of a relatively short focal length, typically less than 55 mm.
- Try to not go much less than 2:1 magnification.
- A large aperture rear lens will help to minimize vignetting with some combinations.
- Vignetting can sometimes be decreased by adding an extension tube on the rear lens. A closer focus setting on the rear lens can also have a similar effect.
Why should I use the front aperture as the main aperture?
For most lens combinations of around 2:1 and above, closing the front aperture to the sharpest aperture and opening the rear aperture fully will produce the best images. This will also tend to produce less vignetting than the opposite although the rule makes less difference at the low end of the magnification range, say around 2:1, than it does at the higher end of the range. Going much lower than 2:1 will almost always produce a large amount of vignetting, although there are a few combinations out there that work well below 2:1.
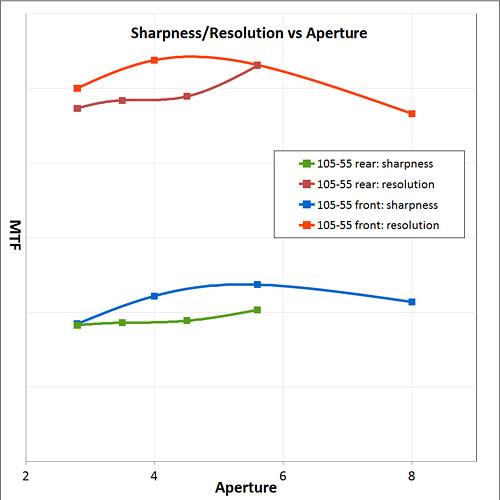
The above graph shows the behavior of my Nikon 105/2.8 coupled to a Nikon 55/2.8, running at just under 2:1 magnification. In general, using the front aperture (the 55 mm lens) gives better sharpness and resolution. Using the front also shows less vignetting than using the rear. I stopped acquiring data with the rear aperture setup above f/5.6 because the vignetting was getting pretty bad.
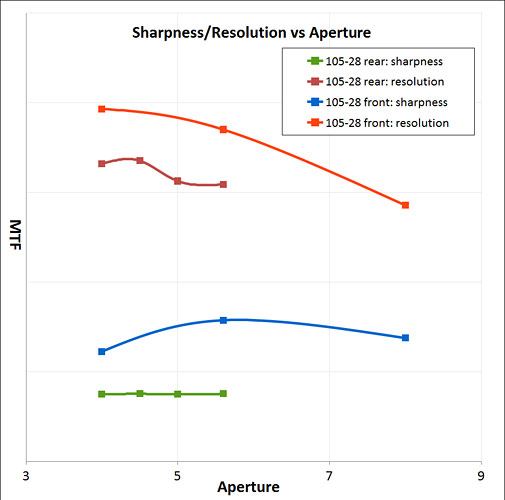
The next graph shows the behavior of the same 105 mm lens coupled to my 28/2.8 lens running a little below 4:1 magnification. In this case using the front aperture significantly outperforms using the rear aperture in both sharpness and resolution. Also, using the front aperture only produces slight vignetting, while using the rear aperture produces quite severe vignetting (why I stopped measuring numbers above f/5.6). Another thing to note is that the sharpness is almost the same no matter what the aperture setting is when using the rear aperture. In addition, the exposure was the same at all aperture settings when using the rear. This suggests that the rear aperture isn't really acting like an aperture should, and is just producing vignetting. I experienced similar results when I coupled my 28 mm lens to my 200 mm lens to produce around 8:1 magnification.
Setting the focus rings and the apertures
Coupled lenses are used much like other high magnification lenses although you now have two lenses to deal with. Both lenses have apertures and focus settings to consider. When using my 200 mm lens with either a reversed 55 mm or 28 mm lens, I can set the focus on the 200 mm lens to near or far. The focus on the front lens works best when set to far rather than close. When it is set to its close setting, the working distance is impaired and you don’t generally get any significant additional magnification.
| Coupled Combination | Mag – Near focus | Mag – Far focus |
| 200 mm – 105 mm | No WD | 1.9:1 |
| 200 mm – 55 mm | 4.5:1 | 3.5:1 |
| 200 mm – 28 mm | 8.4:1 | 6.9:1 |
| 105 mm – 55 mm | 3.2:1 | 1.9:1 |
| 105 mm – 28 mm | 4.5:1 | 3.7:1 |
| 55 – 28 mm | Doesn’t work well | - |
The system also has two apertures which need to be attended to. The aperture settings can be a bit of a problem with coupled lenses in that various combinations of apertures will produce more vignetting. To find the optimum aperture for your setup you can start by taking a test picture with the apertures on both lenses set wide open. A white piece of paper is good for this test and it doesn’t even have to be in focus. If you have significant vignetting at this point, the lens combination will likely never work well for this application as the vignetting will only get worse if you close either of the apertures. If you have a full frame of white you will have a good chance of getting decent images.
The next thing to do is to close down the front aperture to its sharpest setting – typically f/5.6 or f/8 for most lenses. Now you can start to close the aperture on the rear lens a notch at a time until you start to see vignetting on the edges of the image. Open the lens up one notch from there and you should be good to go. Closing the rear aperture partially will help to minimize stray light in the lens. In my own testing (table above), I haven’t noticed any significant resolution improvement with this procedure, but it seems like it should help a little. If you don't want to fuss, leave the rear aperture opened fully.
Shooting Images with a coupled lens
Now that you have the basic settings for each lens, shooting images is much like shooting images with a reversed lens. The aperture on the front lens now needs to be opened up prior to focusing (low number aperture) – focusing is generally much more precise with an open aperture. If the image is too fuzzy with the aperture fully open, you can close it down a notch or two until it is improved.
The final stage is to move the lenses toward the coin until the coin starts to come into focus. Fine focus is best achieved by adjusting the height of the camera with the copystand or by adjusting the height of the object itself (if you have a vertical stage). The aperture on the front lens is then adjusted to the desired setting (typically f5.6 to f8) and the image is shot. The quality of the resulting images that I have taken with coupled lenses is surprisingly high given the amount of optics involved.
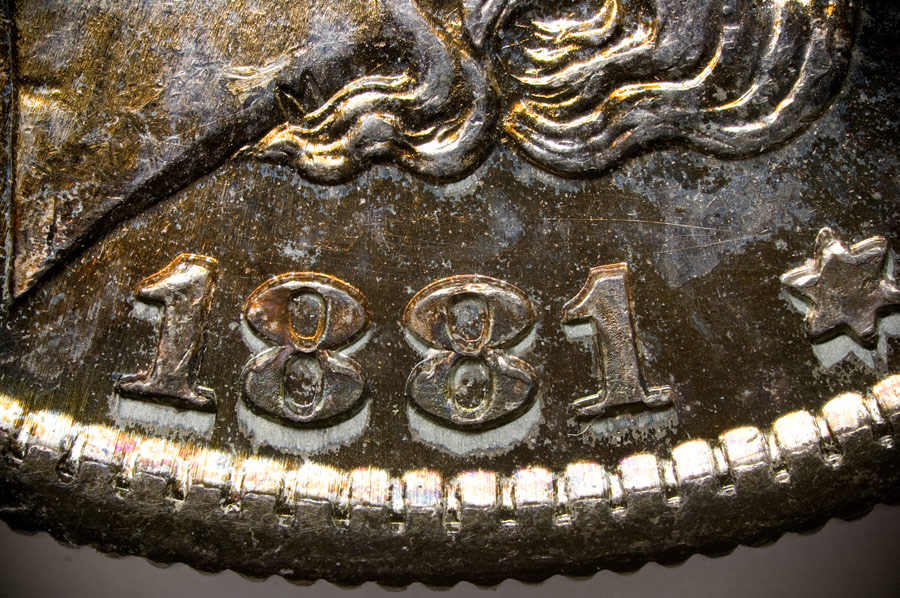
The image above was taken with a 105 mm macro lens (aperture wide open) coupled to a reversed 55 mm macro lens (aperture at f/5.6). Magnification is about 1.9:1. There is some vignetting visible in the corners as is common when shooting at this magnification. Shooting at higher magnification will generally lessen or eradicate the vignetting.
Final thoughts
Coupled lenses are a good method of imaging at a relatively high magnification although you are limited to a narrow range of magnification based upon the focal lengths of the lenses involved. It is worth a try if you have a couple spare lenses sitting around. If you need to buy lenses to do this method, I would stick to better methods such as bellows lenses, microscope objectives, and enlarging lenses.